by Anita Deeley at BeverlyBees.com
Winter has arrived and the girls are hungry! Time to make a Candyboard for Winter feeding.
Buy a candy board frame here!
In the midst of all my running around, cooking and baking for the holidays, the family members I could not yet forget about were my bees.
In winter, honeybees consume much of the honey they work all spring and summer to produce. They form a cluster ball in the hive when the temperature gets cold and vibrate their bodies to warm up the bees inside. (Amazing, isn’t it?) This takes a lot of energy which they get from honey consumption.
This winter has been milder than average, which I am loving, but the warm temperatures are causing the bees to move around more than normal. They keep on doing the bee things they do during warm weather instead of clustering for the winter. There is not much food for them to forage now and this increase in activity uses up more of their stored honey than clustering. Since my hive was on the lower side of surplus honey in the fall, I knew I had to feed the girls to help them get through the winter without starving to death.
In the warmer weather honey bees will drink sugar syrup, but the New England winters are much too cold for that and other methods of feeding have to be used. Some people feed fondant or raw sugar, some make hard candy for the bees and others use candy boards. I found a great tutorial online from Southeastern Indiana Beekeepers Association on making a candy board. Since this method did not require cooking the sugar and making actual candy, it seemed to be an easier method to try than other recipes I had seen.
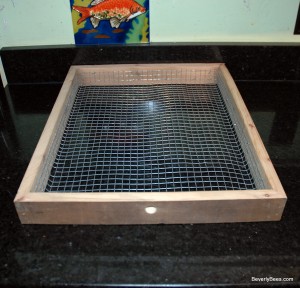
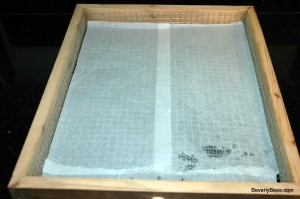
My handy husband went to work making the 2 inch tall candy board frame from scraps of wood we had lying around. He stapled 1/2 inch wire mesh to the inside for a candy support and drilled a 1/2″ hole in the front for the bees to escape. It came out perfect! Thank you, Brian! You can buy a candy board frame from our online store if you don’t have time to make one yourself.
 The Bee Candy Recipe called for
- 15-16 lb. of sugar*
- 3 cups water
- 1 tbsp. plain white vinegar (optional)
- 1 Pollen patty (optional)
*I have found that 16 lbs of sugar is too much for my area in MA. I am cutting this recipe in half for 2012. For more information please read Sugar Candy Board Assessment.
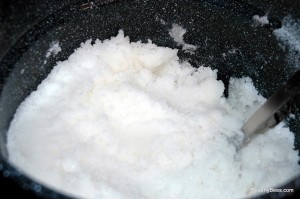
First, I weighed out 16 pounds (yes 16 POUNDS) of sugar and put it into in a very large canning pot. (I told you my girls were hungry!)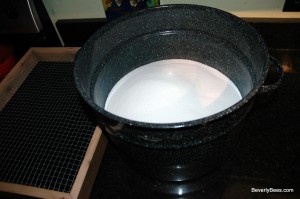 Next, I added the vinegar to the water and poured the water in a little at a time, stopping to make sure it was all mixed into the sugar.
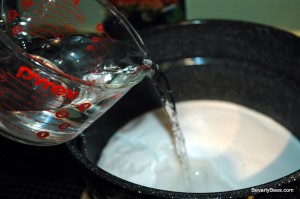
To mix it properly took some muscle but I still think this is easier and faster than cooking sugar candy on the stove.
Next, I lined the wire mesh with paper that came with some beeswax foundation I had ordered for rolling candles. (For 2012 I will not be using this paper read why here.)
Now it was time to pile on the wet sugar. All the while, I was wondering when and if it would eventually turn into a hard candy block.
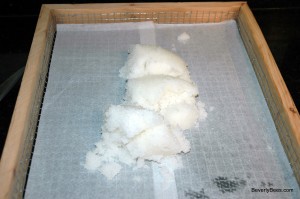
Before more sugar could be added, I needed to block out a section in the front of the board, below the entrance hole, to prevent it from filling up with sugar. This way the bees will have a way to get in and out of the board. I stacked up two of my son’s toy blocks for this purpose and they worked great.
When I reached the halfway point, I placed a pollen patty inside the center of the candy. The idea is that it will take several weeks for the bees to eat enough sugar to reach the pollen patty. The sugar below the pollen will hopefully last them until the month of February when they will be running low on their own pollen stores and will gladly welcome this one. The cold weather should act as a natural refrigerator keeping the pollen fresh for them. 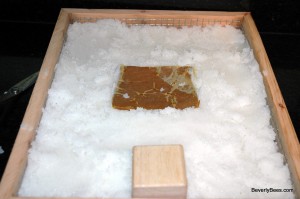 After the patty was securely in place, I covered it with the rest of the sugar and leveled it off using a wooden ruler/paint stick. Viola! Now I had a candy board waiting to dry.
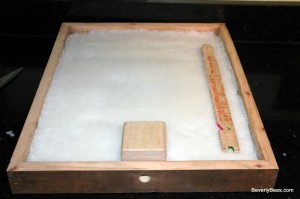 It took almost 24 hours for the candy to dry completely. This was a bit of a pain in my small kitchen, during peak holiday baking time, when kitchen real estate is at a premium, but the bees are worth it! I removed the blocks carefully and to my amazement the candy was dry and hard as a brick.
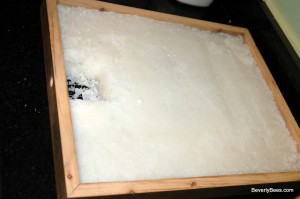
Once the board is made, (which for someone handy is very simple but for me would take forever) you can reuse it year after year. The candy was fairly easy to make and I can see myself doing this again. Although 16 lbs of sugar seems like a lot, any sugar that is not used up can be made into sugar syrup in the spring, so waste not. You can read about how to do that here.
Now it’s off to the hive because my girls want candy!
Copyright © 2011-2019. Anita Deeley, BeverlyBees.com. All rights reserved.
To find out how to install the candyboard please see Installing The Candy Board For Winter Feeding. To find out how the candyboard worked overall read Sugar Candyboard Assessment.
