
A beginner beekeeper’s guide to the parts of a beehive.
by Anita Deeley at BeverlyBees.com

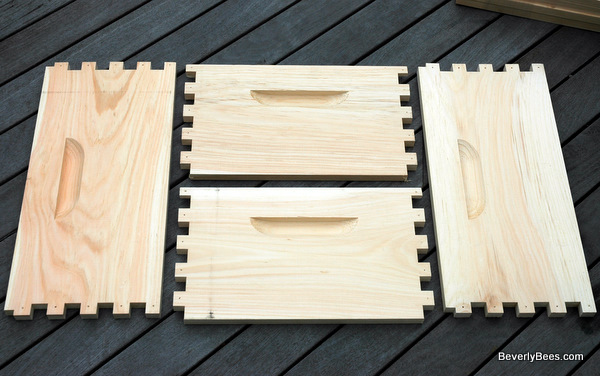
There are many different types of beehives and hive configurations that beekeepers use. I’m going to talk about the most common type of hive, which is called the 10 frame Langstroth beehive. The picture above shows the configuration that I use for my hives.
There are four basic components to a beehive. The bottom board, the supers, the frames and the cover(s). Within those hive components there are many different options to choose from. A common configuration is made using deep supers for the brood chambers and the medium supers or shallow supers for the honey. This is the hive setup I will describe here.
In New England, the beekeeping season is short and the winters are long. In order to sustain the bees throughout the cold winter, they need to have the equivalent of 2 deep supers of wax, honey and brood (baby bees) just to survive. Wax and Honey they make after this is completed goes inside the honey supers. Extra honey and wax which is not needed by the bees can be kept by the lucky beekeeper.
Parts of a Hive from the Bottom Up
(Click the Links for Pictures)
Hive Stand (not pictured) – This is the bottom part of the hive that has an angled landing board for the bees. It’s not necessary and I don’t use one. If you choose to use a hive stand it goes on the very bottom. You should use something to keep your hive off the ground, even if you use a hive stand. This can be as simple as a few cinder blocks with wood on top. I made a simple stand using wood. You can see it here.
Bottom Board – There are two basic bottom boards that beekeeper’s use. The solid bottom board and the screened bottom board. The screened bottom board simply has a screen on the bottom. It comes with a removable insert called the sticky board. Beekeepers use sticky boards for Varroa Mite Counts (as seen here). The screened bottom board also aids in hive ventilation. I have both types, but you only need one. I really like the screened bottom board for pest management.

Entrance Reducer – This is a small piece of wood which fits between the bottom board and the first deep super. It is used for various reasons including protecting the colony from robbers, for weak hives starting out and sometimes as a mouse guard. However a determined mouse can chew right through it, so a metal mouse guard is preferred.

Slatted Rack – This is an optional piece of equipment that is used to help with ventilation and hive congestion. It gives the bees more room between the entrance and the brood chamber. By raising the brood chamber up higher, the slatted rack allows the bees to get fresh air into the hive easier to cool the hive down in the summer. Since the brood is raised up a bit and protected a little more from incoming winds, the queen will tend to lay eggs all the way to the bottom of the frame more often than without one. The bees also are not as inclined to build ladder comb at the bottom of the frames when using this rack. If you can afford it, this is a great piece of equipment to have.

Deep Super – This is a large size hive box. Each super holds 10 frames inside it that the bees build wax onto. Some people use an 8 frame hive box which would require 8 frames per super. For the setup described here, you need 2 Deep Supers with 10 frames each to house the brood chamber.

Queen Excluder – This is a flat rack made of metal or plastic, with holes large enough to allow the worker bees to get through and small enough to exclude the bigger queen bee. This is a handy piece of equipment to have. The most common use is to prevent the queen from laying eggs inside the honey super. I have found the queen excluder to be very helpful for other reasons and even used it to make a two queen hive system one year. You can read more about it here.

Honey Super – The honey super is a box that holds the frames where the bees will store their honey. The honey supers come in different sizes, usually medium or shallow. The picture below shows a medium honey super. It is recommended to use a medium or shallow size super for honey, instead of a deep, because honey is very heavy and the supers can be hard to lift when full. The medium super tends to be the size most beekeepers choose. You can stack as many honey supers on top of the hive as needed for the honey flow. I recommend you purchase at least one honey super when starting out.
Honey Super Frames – These are frames that fit inside the honey super for the bees to build wax onto. If you are using a medium super for honey you need 10 medium frames per box. If you are using a shallow super for honey you need 10 shallow frames per box. You need 10 frames with foundation for a honey super in the setup seen above. There are plenty of different foundation types for honey, the basic being wired wax or plastic. Pick one type of foundation for the entire hive and stick with that to start out. Bees prefer wired wax over plastic, but many beekeepers prefer plastic due to its versatility and ability to stand up against wax moth devastation. The choice is up to you.

Inner Cover – This is a wooden cover that goes on top of the uppermost super. It has an entrance hole to the outside and a hole in the middle. It also has two sides – one for the winter and one for the rest of the year. The inner cover is vital for proper hive manipulation.

Outer Cover– There are several different outer cover types. The cover seen below is a telescoping outer cover. That means it fits over the inner cover with sides that hang down over the top super. This is a common outer cover in New England because of its galvanized metal top and weather resistant fit.

There are plenty of other pieces of equipment you can get once you have the basics down. The important part is just get to it, get your hive ready and start keeping bees.
Copyright © 2011-2021. Anita Deeley, BeverlyBees.com. All rights reserved.
Other Posts You May Enjoy:
- The Unassembled Bee Hive – A Beginner Beekeeper’s Guide
- How To Set Up A Beehive Video – A Beginner Beekeeper’s Guide
- How To Paint A Beehive – A Beginner Beekeeper’s Guide
- How To Assemble A Hive Box or Super– A Beginner Beekeeper’s Guide
- How To Assemble A Frame – A Beginner Beekeeper’s Guide