My new package is doing a great job drawing out the foundationless frames!
This was my first hive check of willow, after installing the package on April 14th and removing the queen cage a few days later. I’ve been so excited to look at this hive, the waiting has been hard. This is my first hive using foundationless frames.
There are many reasons to go foundationless, and here are a few: the bees prefer to draw foundationless comb; they will build natural size comb instead of the size the foundation dictates; natural size comb is supposed to help control varroa mites; and the most important reason to me, natural comb drawn by the bees does not have chemical contaminants in it. Commercial foundation contains chemicals in it from beekeepers using mite products and other pesticides in the hive. Those pesticides accumulate in the wax that is melted down and molded into foundation or put onto plastic frames. Foundationless frames use all or mostly wax that is made by the bees themselves, avoiding these contaminants. These reasons and more suggest foundationless comb is healthier for the bees.
However, I have never seen someone in person using foundationless frames in a langstroth hive with deep size frames (but you can find people online who are doing so). When I approached several beekeepers I knew and respected, they advised me not to try it because the bees will make a mess of things and it will be too hard to extract honey without the comb falling apart. Maybe they are right, but I really wanted to try it anyway and so this experiment began.
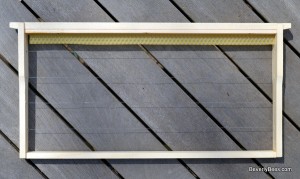
I was all set to start the hive with 10 frames like this, but after speaking to several other beekeepers, I instead decided to alternate between frames of foundation and foundationless frames. This would help guide the bees toward the right direction of comb building. Needless to say, I was both nervous and excited to see what the bees would do with the configuration I gave them.
To my amazement they are doing absolutely incredible and better than I ever expected! They are drawing the foundationless frames correctly. In just 12 days time, they have started working on 8 frames and just about finished 6 of them. There is also capped brood in the hive. Since it takes 9 days to cap worker larvae, this means the queen was released and started laying after being in the hive 1-3 days. That is amazing!
Here’s what the foundationless frames look like when the bees start working on them (2 frames looked like this).
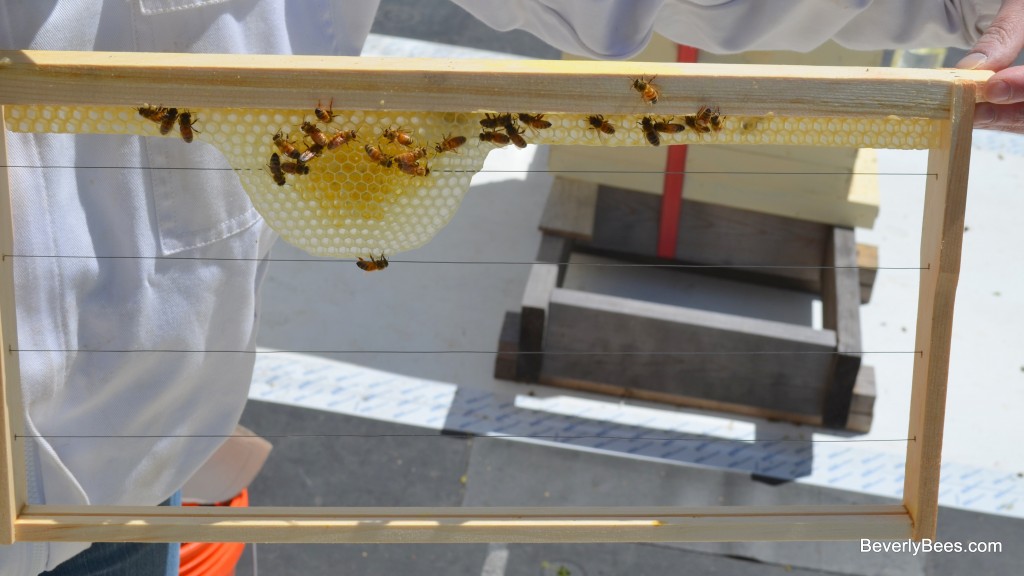
Here’s what the frames look like when they are almost complete (2 frames looked like this).
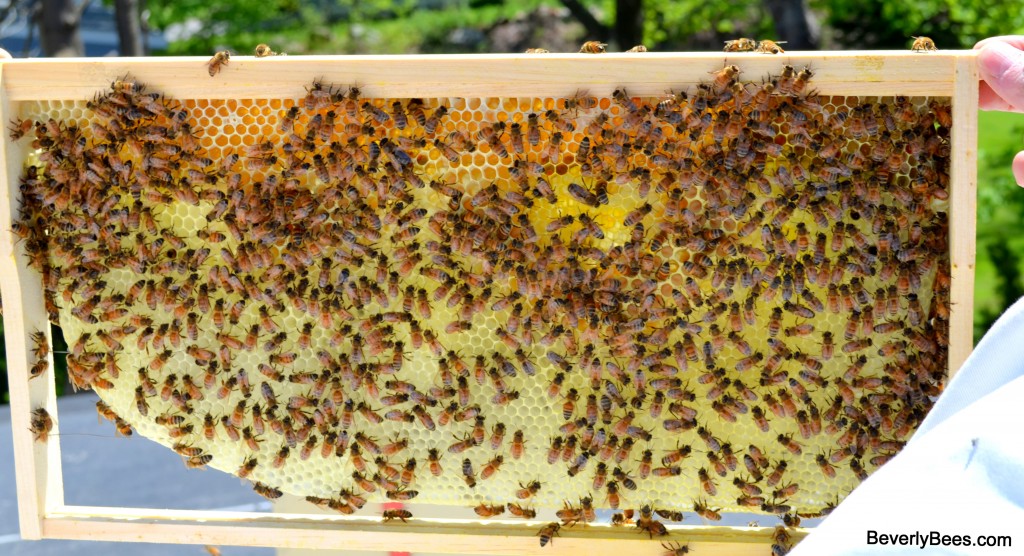
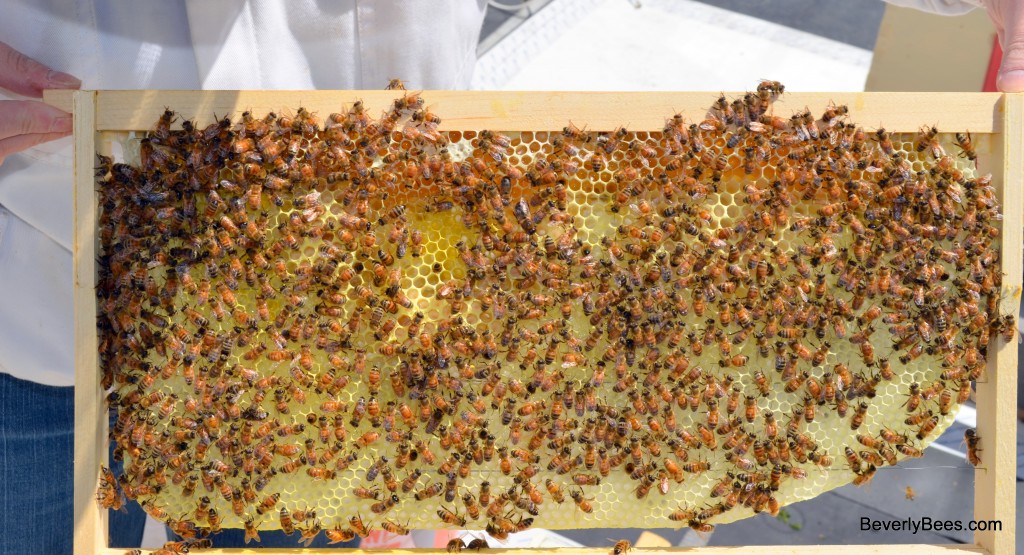
There is a lot of larvae for a new package, lots of pollen, and even some capped honey. I’m feeding them but they are not taking the syrup. All this was built from their own collection of nectar. These bees and their queen are doing just awesome! Here’s a picture of her majesty.

This hive is doing an amazing job building out both the foundationless frames and the foundation. I’m so proud of them! I can’t wait until the next inspection.
Do you use foundationless frames? What is your method? Let me know in the comments below.
Box Breakdown
Bottom Box – Frame 1 wired wax foundation (wwf) undrawn. Frame 2 foundationless frame (ff) newly drawn, being filled with nectar. Frame 3 (wwf) partially drawn, nectar and pollen. Frame 4 (ff) nectar, capped honey, larvae, eggs, pollen. Frame 5 (wwf) capped brood!!!! Eggs, larvae, nectar, pollen, capped honey and the queen. Frame 6 (wwf) capped brood!!!! Eggs, larvae, nectar, pollen, capped honey. Frames 7 (ff) nectar, larvae, eggs. Frame 8 (wwf) nectar and pollen. Frames 9 (ff) newly drawn. Frame 10 (ff) undrawn. Moved frame 9 to 10 and frame 1 undrawn foundation to 9. Moved frame 10 to 2. May need to super next week.
To see more detailed pictures and descriptions please view the gallery below. Just click on a picture then scroll through the slide show by clicking on the arrows. If you click on the picture the gallery will close. If you are viewing this in an email or reader you may have to read this post on the website for the gallery and descriptions to display properly. Enjoy!
Copyright © 2011-2016. Anita Deeley, BeverlyBees.com. All rights reserved.
Other Posts You May Enjoy:
- Three New Packages of Bees And Crocus Hive
- Picking Up The Package Bees
- Installing Package Bees In A Rooftop Hive Named Willow
- Bee Package Installation – Don’t Forget The Cork!
- It’s Queen Cage Removal Time!
This post was shared on the Barn Hop.
